Introduction
MasterDC offers Private Backup as a complementary service to all of our services in both data centre locations – Prague and Brno. Due to the transfer speed, it is preferred to back up to the same location where the server is placed. For better security, however, we also offer for an additional fee a Geo-backup service, which means you can back up to the second location (i.e., from Prague to Brno or vice versa).
To access the backup space, you must select one of the following four options:
- iSCSI Target
- Internet Small Computer System Interface is an IP-based network storage standard.
- It is suitable for backing up Windows servers as they already have an iSCSI initiator built into the system.
- The iSCSI target must only be accessed from one location; otherwise, the file system may become corrupted.
- NFS Storage
- The Network File System is a distributed file protocol designed for remote access to files over a computer network.
- We recommend it especially for backing up Linux servers.
- SMB storage (Samba)
- Server Message Block (SMB) is a protocol used for sharing files, printers, and other network resources, commonly utilised in Windows environments.
- We recommend using it for backing up Windows servers and workstations, as SMB support is integrated directly into the operating system.
- Space Accessible via FTP, SFTP, SCP, SSH, and RSYNC
- This option is recommended if the backup space is not required to be permanently connected to the server and is ideal for multiple location access.
- Includes simplicity of connection and support for many operating systems and clients, including web browsers, which is also an advantage.
For all of these methods (except FTP in the third option), we limit access to the backup space to specific IP addresses to maintain even greater security. Therefore, the addresses must be sent to the technician when setting up the services.
All data on the backup servers are in RAID10, which means there is no data loss if the disks in the server fail. In addition, the backup servers are connected into two independent power branches and have dual internet connectivity to maintain the highest availability.
iSCSI Target
Connecting an iSCSI Target to Windows
- Open Server Manager, click on the Tools tab on the top right and select the iSCSI Initiator.
- Windows will now notify you that the iSCSI service is not running and ask if you want to start the service. Choose Yes.
- Enter the address of the destination backup server and select the Quick Connect option.
- Then you will see that the system has successfully located the iSCSI target. However, the connection is not yet active, so press Finish.
- Select the iSCSI target, click Connect and in the next window, click Advanced.
- Check the Enable CHAP login checkbox, fill in the Name and Secret Key, and confirm by pressing OK twice. Leave everything else set as default.
- If there is no problem, you will see the status Connected, so confirm with OK.
- Then in Server Manager, click the Tools tab, and select Computer Management.
- On the left-hand menu, choose Disk Management, and you will already see the new, not yet assigned space.
- Now right-click on this space and select Online.
- The Initialize Disk window will now be displayed. Select the new disk or partition type and click OK to confirm.
- It is now possible to add the iSCSI target to the system as a new partition, select New Simple Volume.
- You can also choose the size of the partition in the wizard. If you want to allocate all available capacity, leave it as the default, and click Next to confirm.
- You can assign any letter to the new partition, then click Next to confirm.
- It is also a good idea to format the new volume. We now can select a file system or name, then click Next to confirm.
- Now you can see the iSCSI target directly in the system, and it is ready to upload the first data.
Connecting an iSCSI Target to Linux
- Install the necessary iSCSI Initiator package:
- CentOS, RHEL: yum install iscsi-initiator-utils
- Debian, Ubuntu: apt install open-iscsi
- Enter the name of the iSCSI target into the iSCSI Initiator configuration:
vim /etc/iscsi/initiatorname.iscsi

[..]

InitiatorName=iqn.2019-03.cz.master:backup17.bcp-id-7894

[..] - Modify the iSCSI Initiator configuration to authenticate via CHAP:
vim /etc/iscsi/iscsid.confAdd the following lines and edit according to your data (ideally at the end of the file):
[..]

node.session.auth.authmethod = CHAP

node.session.auth.username = bcp-id-7894

node.session.auth.password = password

[..] - Start the service and set it to launch automatically after a reboot:
systemctl start iscsi

systemctl start iscsid

systemctl enable iscsi.service

systemctl enable iscsid.service - Locate your iSCSI target on the backup server:
iscsiadm -m discovery -t st -p backup17.master.czYou should see the following output:
81.31.35.252:3260,1 iqn.2019-03.cz.master:backup17.bcp-id-7894 - Log in to the iSCSI target:
iscsiadm --mode node --targetname iqn.2019-03.cz.master:backup17.bcp-id-7894 --portal 81.31.35.252 --loginThe output should look like this:
Logging in to [iface: default, target: iqn.2019-03.cz.master:backup17.bcp-id-7894, portal: 81.31.35.252,3260] (multiple)

Login to [iface: default, target: iqn.2019-03.cz.master:backup17.bcp-id-7894, portal: 81.31.35.252,3260] successful. - You should now be able to list the connected space using the command:
lsblk –scsisdc 9:0:0:1 disk IET VIRTUAL-DISK 0001 iscsi - According to the output, the space is seen as dev/sdc in the system. So now you can create any file system over it, for example, XFS.
mkfs.xfs /dev/sdc -f - To keep the changes after a server restart, you must add an entry to the /etc/fstab file. Therefore, list the space ID on the system:
blkid | grep "/dev/sdc"and insert the UID into the /etc/fstab file, e.g.,UUID=07df94fa-1c01-4764-8a49-bc6f380cf6ca /mnt/iscsi xfs _netdev 0 0 - Now (if you do not already have one), create a path where you mount the space, e.g.,
mkdir -p /mnt/iscsi - Mount the space:
mount /mnt/iscsiormount -a - Using the
dfcommand, see if the new space is connected and mounted:df -h
File system Size Used Availabne Use%
Connected to
/dev/sdc 50G 33M 50G 1% /mnt/iscsi
NFS
Connecting an NFS Space to Linux
- Install the NFS client package:
- CentOS, THEL:
yum install nfs-utils - Debian, Ubuntu:
apt install nfs-common
- CentOS, THEL:
- We now create the location in the system where we want to mount the space, for example,
mkdir -p /mnt/nfs - Connect the space to this location:
mount -t nfs backup17.master.cz:/nfs/78945 /mnt/nfs/ - Use the
dfcommand to check the operation. - To keep the space connected after a system reboot, insert a record in the /etc/fstab file, e.g.,
backup17.master.cz:/nfs/78945 /mnt/nfs nfs defaults,soft,rw,async,user 0 0
Connecting an NFS Space to Windows
- Search and install the NFS client package using PowerShell:
PS C:\Users\Administrator> Get-WindowsFeature -Name NFS*

PS C:\Users\Administrator> Install-WindowsFeature -Name NFS-Client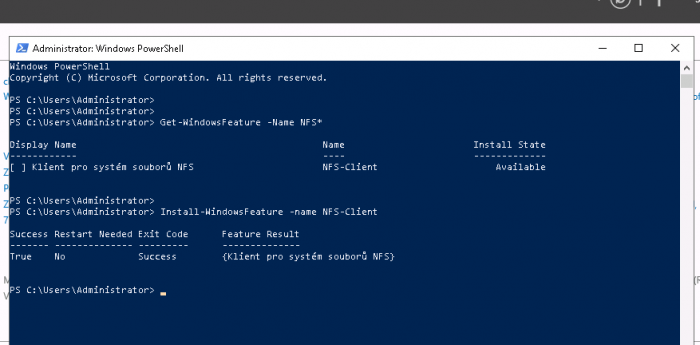
- There are two options to choose from – to connect the space temporarily or permanently:
- To temporarily connect the space, type the following command in the command prompt (CMD):
C:\Users\Administrator> mount \\backup17.master.cz\nfs\78945 E:This will connect the space as partition E:. - To connect the space permanently, open This PC, select the Computer tab on the top right, and then Map Network Drive.
- To temporarily connect the space, type the following command in the command prompt (CMD):
- Select the drive letter, enter the path to the space, and click Finish.
- You should see that the drive is successfully connected to the system and is ready to upload data.
SMB (Samba)
Connecting via PowerShell
- Open PowerShell (e.g. right-click the Start button and select Windows PowerShell or Terminal).
- Enter the following command:
New-PSDrive -Name "Z" -PSProvider FileSystem -Root \\backup123.master.cz\vm123$ -Persist -Credential (Get-Credential) - After running the command, a window will appear asking for your username and password provided by MasterDC.
- Once successfully connected, the network drive will appear in This PC as a standard drive under the letter Z.
Connecting via CMD
To connect via CMD (Command Prompt), use the following commad:
net use Z: \\backup123.master.cz\vm123$ /user:<account> <password> /persistent:yesZ:– the drive letter you wish to assign.<username>– your login name for the storage.<password>– the corresponding password./persistent:yes– ensures the drive is reconnected automatically after a restart.
After confirming the command, the network drive will be connected immediately under the selected drive letter.
Connecting via File Explorer (This PC)
To permanently connect to a storage space via SMB in Windows (i.e. so it remains available after a restart), follow these steps:
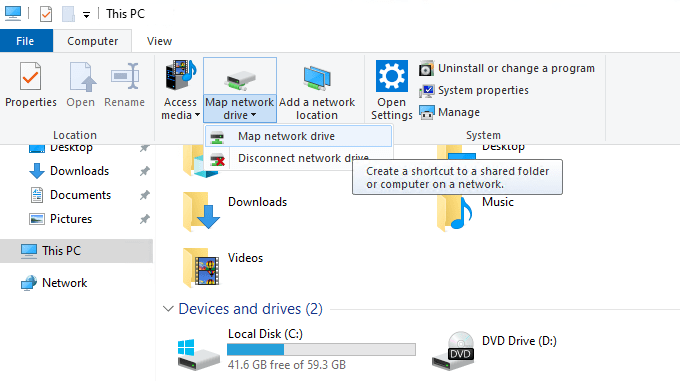
- Open This PC (or File Explorer) and, in the top menu, select Map network drive.
- In the Map Network Drive window, choose a drive letter for the new network location (e.g. Z:), and enter the network path to the backup storage in the format \\backup123.master.cz\vm123$.
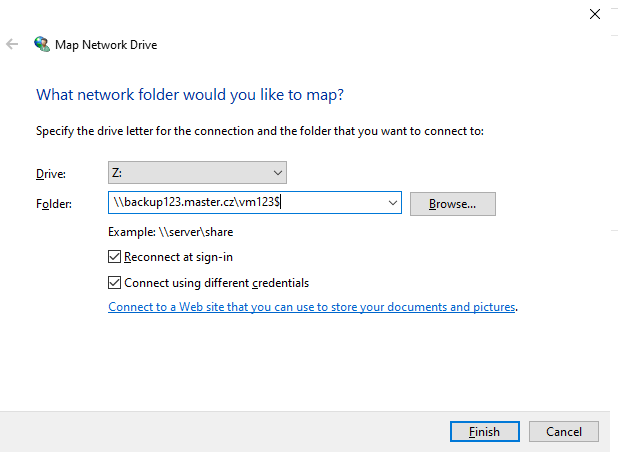
- Tick the box Reconnect at sign-in if you want the drive to be mapped automatically each time you log in. Then also tick Connect using different credentials and click Finish.
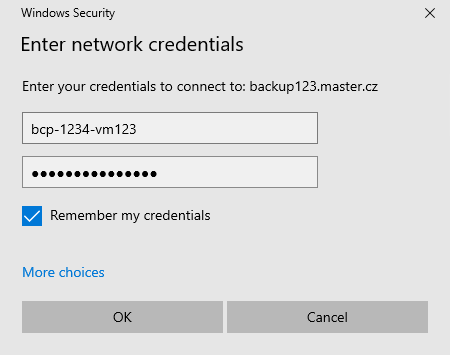
- Enter the network credentials provided for access to the backup storage.
- Once authenticated, the network drive will be connected and displayed alongside your other drives.
Space Accessible via FTP, SFTP, SCP, SSH, and RSYNC
FTP and SFTP Access from Windows
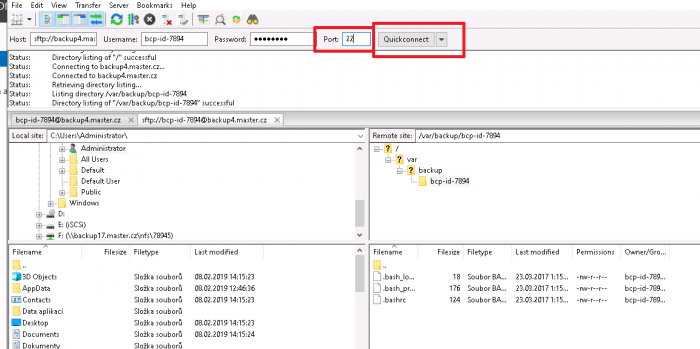
- To connect to the FTP from Windows, we recommend using the open-source client FileZilla (download here: https://filezilla-project.org/). Then, just fill in the destination server, username, and password, and click Quickconnect.
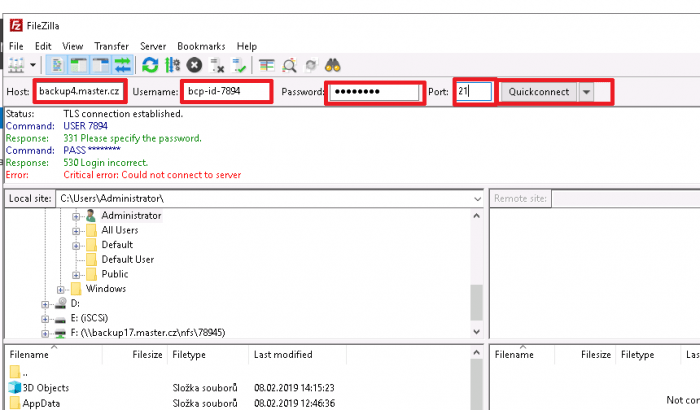
- Do the same with SFTP, and force the transfer via port 22.
Access via FTP, SFTP, SCP, SSH, and RSYNC from Linux
FTP
- Install the FTP client package:
yum install ftp - The subsequent connection is quite simple; just enter the server address and login details:
[root@cloud-1059 ~]# ftp backup4.master.cz

Connected to backup4.master.cz (89.185.245.246).

220 (vsFTPd 2.2.2)

Name (backup4.master.cz:root): bcp-id-7894

331 Please specify the password.

Password:

230 Login successful.

Remote system type is UNIX.

Using binary mode to transfer files.

ftp>

ftp> - Now you can perform all possible operations:
- Listing Files in a Directory:
ls - Downloading Files:
get file.txt - Uploading Files:
put file.txt - etc.
- Listing Files in a Directory:
SFTP
Proceed the same with SFTP. For example, connect with the following command: sftp bcp-id-7894@backup4.master.cz; after that, just enter the password.
Other options for accessing port 22:
This type of space can be accessed through other protocols that provide transmission over secure port 22. For example:
- SSH
ssh backup4.master.cz -l bcp-id-7894 - SCP
scp bcp-id-7894@backup.master.cz /path/to/file - RSYNC
rsync bcp-id-7894@backup.master.cz /path/to/file