Introduction
The hosts text file is used to map IP addresses to hostnames. It can also be used to block access to various websites or connections to certain servers. This tutorial describes how to edit the hosts file on Windows, Linux, and macOS operating systems.
When your server tries to connect to another server using its hostname (i.e., a website, network drive, etc.), the server first scans the local hosts file to see if there is a record of that hostname. If the hostname record is found, the associated IP address is used to connect to that host. On the other hand, if there is no record for a specific hostname in the hosts file, the server looks up the hostname in Domain Name System (DNS) servers.
The Utilisation of the Hosts File
Setting up and editing the hosts file can be helpful in the following cases:
- Website testing – If you have an unpublished website to test, you can add its hostname to the hosts file with the IP address 127.0.0.1 (an IP that identifies your own server), making the website only accessible from your server.
- Blocking websites – If you want to block access to a particular website, add the hostname to a hosts file with an IP address of 0.0.0.0. Then, during a subsequent connection attempt, your server will look for an IP address 0.0.0.0, which is an invalid IP; therefore, the connection will not occur.
- Adding custom hostnames – This is useful when multiple computers are connected to a network, and you want to distinguish them via custom names. First, add each computer’s hostname and corresponding IP address to the hosts file on the server. The connected computers will then be displayed under your chosen names, for example,
123.456.7.10 pc1,123.456.7.11 pc2.
Hosts Record Format
Firstly, the record syntax is always the same. The IP address to which the server should redirect network traffic when the hostname is entered comes first, followed by the hostname itself. Moreover, a note can be added to the record, but it has to be tagged with a #. The record will then look like the following:
127.0.0.1 wwww.address.com #noteThe IP address 127.0.0.1 indicates the local (own) server. When traffic is redirected to this address, the server will always look for locally hosted addresses, called a loopback. You can also use IP address 0.0.0.0, which blocks access to the associated hostname (server).
Hosts File on Windows
- Open Notepad as an administrator. To do this, right-click Notepad and select Run as administrator.
- In Notepad, open the hosts file by clicking File > Open… > navigate to C:\Windows\System\drivers\etc, and select the hosts file.
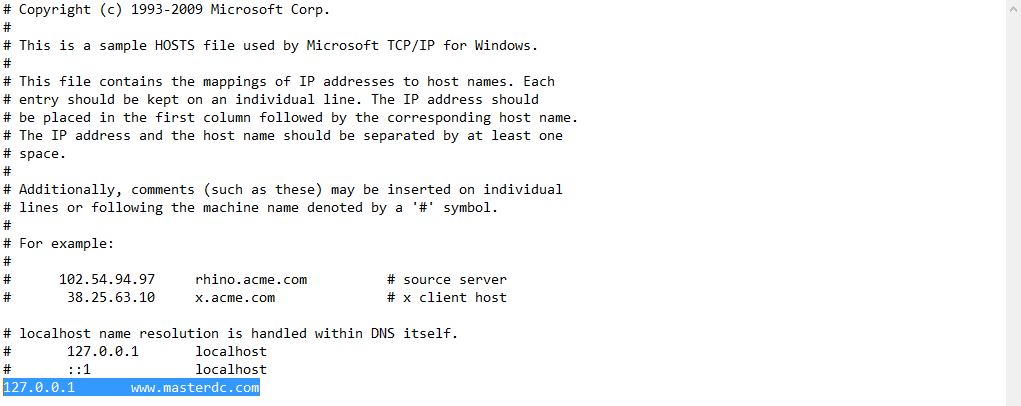
- Add a new line with the desired IP address and hostname. The record format will be as follows:
IP_address hostname
For example127.0.0.1 www.masterdc.com. - Save the modified hosts file: File > Save.
Alternatively, press the Windows + R on your keyboard to edit the file and enter: c:\windows\system32\drivers\etc\hosts > OK. Next, select Notepad to open the file. Then you edit the file as needed, as described above.
Hosts File on OS Linux
- Open a terminal (Ctrl + Alt + T).
- Run the following command to open the hosts file in administrator mode:
sudo nano /etc/hosts. - Add a new line with the desired IP address and hostname separated by a space or tab:
IP_address hostname
For example127.0.0.1 www.masterdc.com. - When the changes have been completed, save the file using Ctrl + O, and close the editor using Ctrl + X.
- You can verify your changes using the command
cat /etc/hosts.
Hosts File on macOS
- Open the Terminal (Cmd + spacebar, search Terminal).
- Run the command to open the hosts file in the editor:
nano /etc/hosts. - Add the desired records to the file. Each record contains the IP address and hostname separated by a space or tab.
IP_address hostname
For example127.0.0.1 www.masterdc.com. - When the changes have been completed, save the file using Ctrl + O, and close the editor using Ctrl + X.
- You can verify the saved changes in the Terminal using the command
cat /etc/hosts.