Introduction
Customers of MasterDC Cloud Hosting services can manage their highly available virtual servers on the VMware platform via Cloud Director, a fully functional HTML5 web interface. Cloud Director is a leading global platform for delivering cloud services and managing their resources.
Login
For each virtual server provided as part of the Cloud Hosting service, customers also receive access to Cloud Director. You can log in using the URL provided by our administrator in the order ticket. The URL follows this format: cloud.master.cz/tenant/<customer_number>. For example: https://cloud.master.cz/tenant/1234.
The login credentials are as follows:
- Username: your customer number, e.g. 1234
- Password: the same password you use to access the Customer Administration
Cloud Director Overview
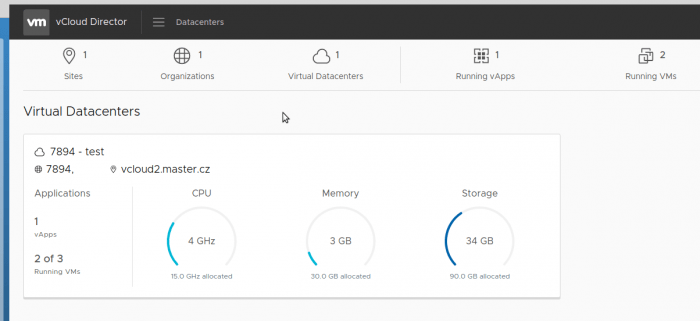
After logging in successfully, the main screen (shown in the following image) displays your virtual data center, including an overview of the number of running servers and the allocated and currently used resources, such as CPU, RAM, and disk space.
The following image shows a quick overview: we have three servers in total, two of which are currently running. The total allocated CPU capacity is 15 GHz, of which 4 GHz is currently in use. The same overview is provided for RAM and allocated disk space.
Clicking on the relevant virtual data center displays a list of vApps. When you have a larger number of virtual servers, you can organize them into logical groups called vApps.
An example of this overview is shown in the following figure. As you can see, we have a single vApp named vApp_7894_test.
At the vApp level, you can, for example, create private networks that are accessible only to servers within the respective vApp.
Another advantage is the ability to configure permissions for different users for security purposes. For example, if multiple virtual servers are managed by different administrators (such as when reselling services), you can assign each vApp to a different user account. An administrator responsible for one server therefore cannot see objects in another vApp that they are not responsible for, and so on.
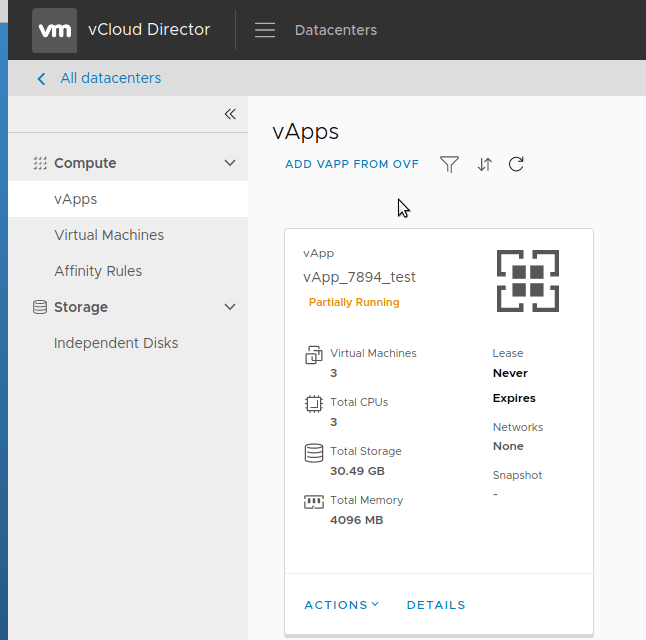
The overview also shows how much of the allocated resources each vApp is using and how many virtual servers it contains.
Under each individual vApp, you can then see the virtual servers themselves (as shown in the following image).
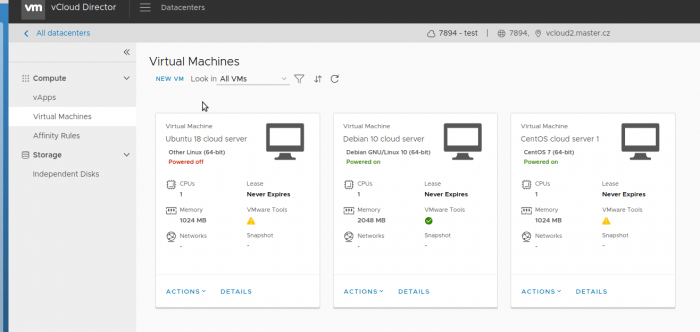
As shown in the image, we have three virtual servers running different operating systems. Two are currently running, while the third is powered off. In addition to the server’s name and operating system, the overview also shows the server’s hardware specifications.
Managing Virtual Servers
Clicking the Actions button for an individual virtual server opens the following context menu (shown in the next image).
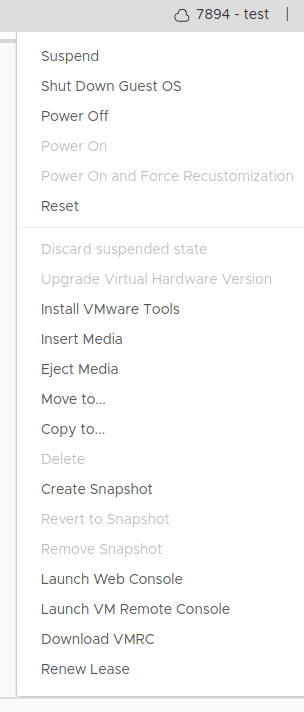
The menu provides the following options:
- Power ON – powers on a virtual server that is currently powered off
- Shut Down Guest OS – shuts down the server by properly shutting down the operating system
- Power Off – immediately powers off the server (equivalent to physically disconnecting the power supply)
- Reset – restarts the server
- Launch VM Console – opens the server’s web console
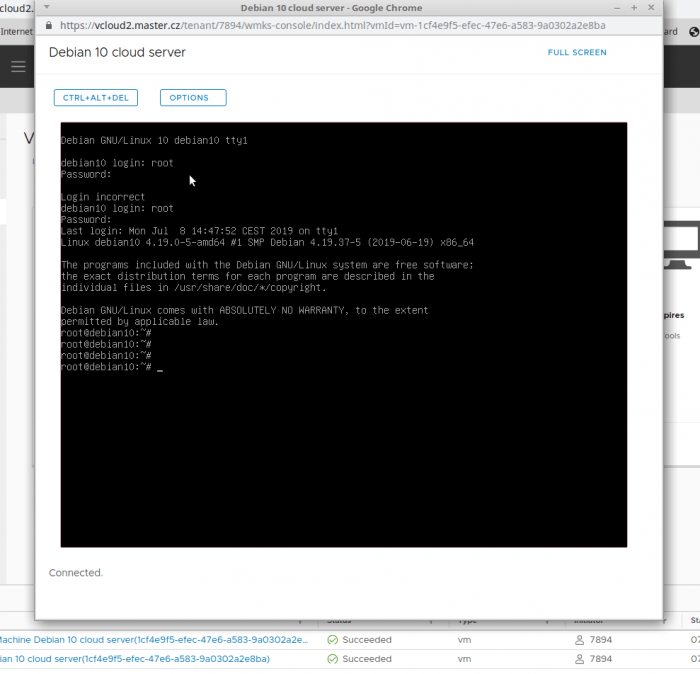
For emergency access to a server (e.g. when an SSH/RDP connection is unavailable), you can also access it through the web console, as shown in the following image.